Why Python?
Python, the most favorite language among beginners, is known for its simplicity and its clean and concise way of implementing things. Despite the hype around machine learning, Python has done enough to conquer the web application domain as well.
It is one of the most preferred languages to build backend applications. Even when facing good old PHP and full stack Javascript, Python has its place because of the ease of implementation that keeps beginners hooked.
Why Flask?
Just like how we get confused with which Python version to use, Django vs Flask is another debate. Though statistics say Flask is simple and easy to get started with while Django is heavy for building web applications, there is another important reason why you should we look for Flask over Django.
We, as developers in the era of the cloud, are moving away from single-tiered software applications. With microservices architecture in place, running multiple Django servers is going to make your services heavy because of all the built-in apps it packs with.
Software with Setup:
- Python – 3.7
- Pycharm IDE
- create a project ( todolist-flask)
- virtualenv
- Install flask with the command
pip install flask
Let’s build the application
Operations we expect to add in application:
- Create an item
- Delete an item
- Mark an item done
- Update an item
These are low level functionalities, but we can go with features like
- Categorizing ToDo items into workplace, personal etc;
- Tagging items
- Prioritizing items
- Remainder
Data Look
- Create an Item – Title, Short Description, CreateOn, DueOn
- Delete an Item – _is_deleted
- Mark an Item Done – _is_done
- Update an Item – We are not editing any other info other than one we created, so no additional parameters required.
Schema Design:
For database, we are using SQLite relational db where it senses we store data in tables. we need a table with columns.
ToDo_Works
Id                   Primary Key
Title                Text
Description          Text
CreateOn             Date
DueOn                Date
_is_deleted          Boolean
_is_done             Boolean
This looks good to complete if we are designing a system for only one person, but we are not. We are going to implement this large number of people which requires lots of users data needs to be stored that are signed in into the system and maintain a reference to the user with each ToDo Work in ToDo_Works table.
User
   Name             Text
   Email            Email
   Id               Primary Key

ToDo_Works
   ...
   ...
   CreatedBy        Foreign Key(User)
Now, for our Application, we are going to differentiate the code into 3 files
app.py– the entry and exit pointservice.py– request to response conversionmodels.py– everything that needs a database handling
Why we need 3 different files?
By differentiating the app into 3 different files we are separating the business logic(service.py), the application layer(app.py) and the data(models.py). In technical terms, this is called an MVC — Model View Controller Pattern.
# 1.import sqlite
import sqlite
# 2. create a connection to DB
conn = sqlite3.connect('todo.db')
# 3. Write your sql query
query = "<SQLite Query goes here>"
# 4. execute the query
result = conn.execute(query)
Throughout the models.py file you see this pattern repeating for creating, deleting, updating items in our Todo list.
Creating tables
Creating Tables
Let’s keep aside Flask for now and look at the Pythonic way of creating these tables. To handle all the DB related operations we are going to create a separate file called models.py
It consists of two parts
- Schema — Where are the DB Tables are created and maintained.
class Schema:
    def __init__(self):
        self.conn = sqlite3.connect('todo.db')
        self.create_user_table()
        self.create_to_do_table()
        # Why are we calling user table before to_do table
        # what happens if we swap them?

    def create_to_do_table(self):

        query = """
        CREATE TABLE IF NOT EXISTS "Todo" (
          id INTEGER PRIMARY KEY,
          Title TEXT,
          Description TEXT,
          _is_done boolean,
          _is_deleted boolean,
          CreatedOn Date DEFAULT CURRENT_DATE,
          DueDate Date,
          UserId INTEGER FOREIGNKEY REFERENCES User(_id)
        );
        """

        self.conn.execute(query)
    def create_user_table(self):
        # create user table in similar fashion
        # come on give it a try it's okay if you make mistakes
        pass
2. Todo — Operations related to ToDo table
You can think of models as a binding that associates DB tables with associated functions. Hence we create a class with 4 methods Create, update, delete and list which correspond to 4 common SQL queries CREATE, UPDATE, DELETE and SELECT
class ToDoModel:
    TABLENAME = "TODO"

    def __init__(self):
        self.conn = sqlite3.connect('todo.db')

    def create(self, text, description):
        query = f'insert into {TABLENAME} ' \
                f'(Title, Description) ' \
                f'values ("{text}","{description}")'

        result = self.conn.execute(query)
        return result
   # Similarly add functions to select, delete and update todo
I wrote only create function similarly add select function, delete function and update function to the file when you are developing the application.
The View Functions
The view functions as I already mentioned is the entry and exit point of the system. The kind of decisions that we take in this file include
- Type of input we expect from the user — JSON, File, free text etc.,
- Type of output we are providing the user — JSON, file, HTML page etc.,
- Authentication of the requests
- Logging the requests
# app.py

@app.route("/todo", method=["POST"])
def create_todo():
    return ToDoService().create(request.get_json())
Finally
Now we have all our functions in place talking to each other. All we got to do is hit the API endpoint, create some ToDo Items and see it all working in action.
Throughout this blog, I have never talked about how are we going to build an interface for people to enter the Todo items and where they mark them done etc., As I said, in the beginning, we are learning not just Flask but also the practices followed in the industry.
Most of the software out there works with completely separated backend and frontend. What we have created is a backend system.
To see it working we can build a front-end, which we will do with React in the next blog. But for now, I am going to show you how you can consume it with Python.
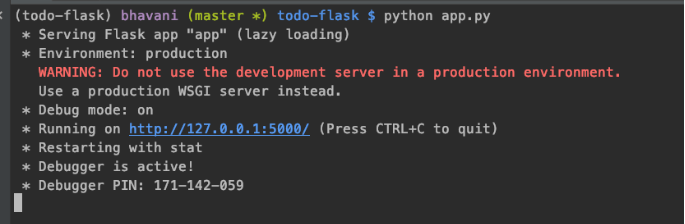
- Let your
app.pybe running in one console. Now as you see it is running in my localhost at port 5000.
2. Let’s create our first todo. Open another terminal. I use request python package to consume APIs with Python.
pip install requests
3. Open python shell and hit the API
$ python
>>> import requests
>>> requests.post("http://localhost:5000/todo",
                  json={"Title":"my first todo",
                        "Description":"my first todo"})
<Response [200]>
requests.post calls the post API we just created with the data required to create a ToDo Item. We get a response 200 which means it is successfully created.
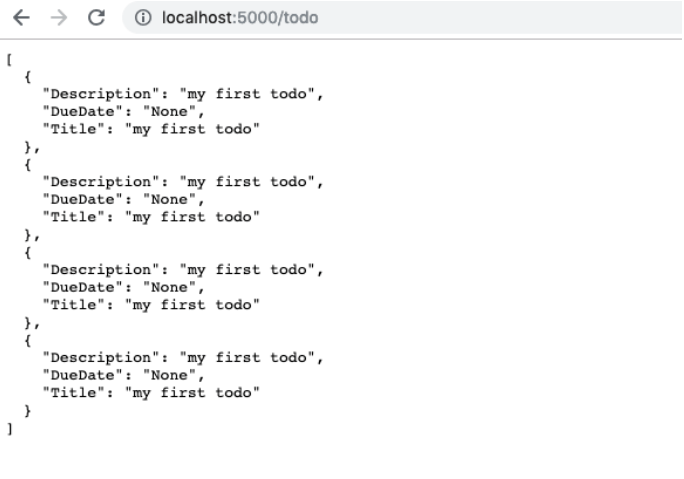
I have run the code 4 times and on hitting the /todo API with GET method I get the following response.
If you have come this far into the blog give yourself a pat on the back because guess what? You’re awesome!!. This is just the starting point.
Total Running Repository is uploaded on GitHub.
Author: Mihir Bommisetty
follow on Instagram: mi.hi_r
