If you’re one of those readers: I’m glad. But today, hopefully, I can make it up to you. I realize you are interested to grow your career as a website builder, or do understand web design easily.
The most common question I get from beginner readers is along the lines of: “how do I get a website up and running so that I can start growing my electronic society?”
of course it’s a great question. and, it’s one that deserves an answer.
Today, I’m going to go through the process of building a website up and running from zero level. I’ve given it down into clear steps and I think have tried to make things as clear as possible, everything from a website builder, perhaps using a website template to web design.
Ready? Let’s go…
Why we shouldn’t use third-party sites to develop?
Everyone might have seen advertisements for website builders, especially website templates, that let us “create a website by clicking a button build!!”.
websites like:
- Blogger
- WordPress
- Tumblr
- TypePad
- Wix etc..
Most of these offer both free and paid plans on the basis on how complex we want our web design, if we need web hosting and how much traffic we need the web server to maintain traffic-wise.
I understand why these website templates would be that much tempting to the novice website developers, but we should really avoid them.
If you’re just hoping around and blogging as a hobby, no problem, we can use a website template.
But, if we’re trying to build a business website, we’re stepping intentionally towards fail.
My suggestion: don’t do it!
Here are some reasons, why we need to avoid them?
Reason #1 – It costs money as per our requisites.
Reason #2 – It’s ideas are limited.
Reason #3 – It’s not much easier to understand.
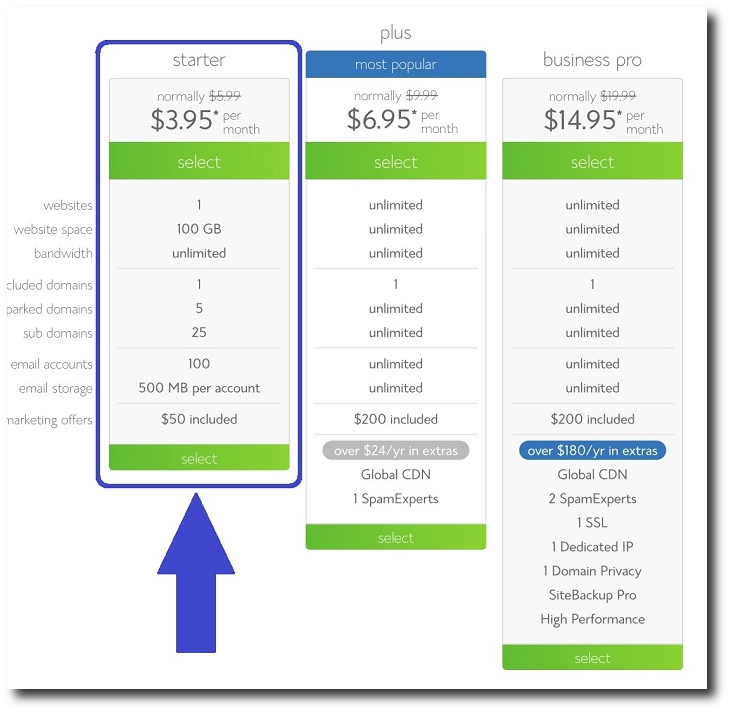
Step 1: Our website needs a place to live we call it as web hosting:
The first part of a website that we need to bother is hosting.
Think of your website as a collection and large package of files. When it got finally “hosted” on your computer, only you can open it up.
When you host those files on a web server, anyone can connect to that server through the internet.
Hosting companies offer space on these servers, or even on your own dedicated web server if you’re willing to pay for it. I would prefer your own dedicated servers for security, privacy and healthy reasons.
You purchase a hosting package from a hosting provider, and they will let you upload your website files. Once you connect that domain name (will discuss about domain name in step 2 don’t skip!!), anyone can view your website.
There are a few factors that we need to look in web hosting regularly:
Hosting factor #1 – Uptime reliability:
If your hosting isn’t operating as it should be, no one can access your website from any web server. This is just as bad as not having a website in the first place.
Hosting factor #2 – Customer service: Things will surely go wrong. that is fact. If you’re a beginner with websites, you’re going to mess things up, once in a while.
Usually, things are easy to fix, at least to an expert. so we need to look for the hosting platform where there can be a best customer service.
Hosting factor #3 – Speed is king: While I’m not going to deep into the fine details right now because they aren’t that important before you have your site up and running, site speed is extremely important.
Step 2: The perfect name: It’s time to create some eye-catchy domains for putting some thought into what your website will be about just for clicking that domain name.
If you already have an idea in mind, this will be easy.
Option #1 – Brute force method: If you’re a creative person, you can try your hand for coming up with a great domain name, from the top of your head.
Option #2 – Use a tool: If you need a little gist in creativity in getting a domain, there are some great free domain name generators at your disposal.
They work slightly different from each other, but the process is generally the same.
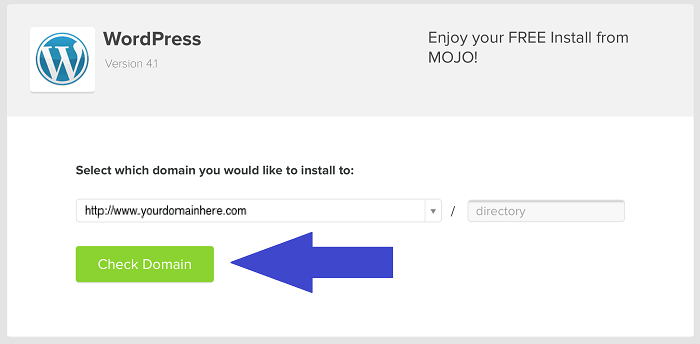
Step 3: Make building and editing your website easy with a CMS:
CMS stands for content management system.
Remember that you have to store all your website’s files collection / package on your hosting server. If you really wanted to, you could edit these files every time you wanted to make a change to your website.
Obviously, that’s kind of a pain to do.
A CMS lets you edit your website from the domain itself. You can log in to the domain and then customize your layout, settings and content, as well as create new posts and pages, often using website templates that are easy to use.
I can say in other words: It makes creating and updating a website much easier and saves you a lot of time.
There’s no perfect CMS. There are hundreds out there, some better than others. In general, though, all of the top ones have different strengths and weaknesses.
I’m going under the assumption that you’re just trying to get a basic website or blog up and running. If your response is yes, stick to one of the popular CMSs that I’m about to outline. It will make your work a lot easier.
If you’re trying to create a custom web application, you’re going to need a custom solution.
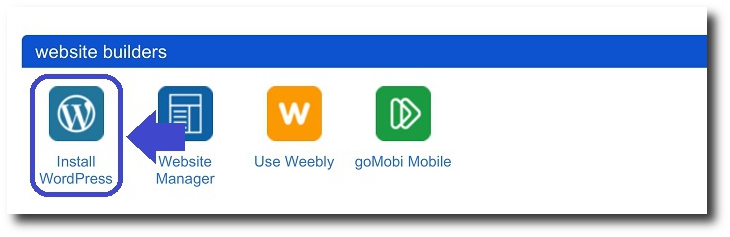
Option #1 – WordPress
Option #2 – Joomla
Option #3 – Drupal
Option #4 – Rainmaker
Option #5 – GoDaddy
Step 4: How to edit your website without messing everything up:
I remember being a complete beginner to all things internet and being scared that I would break a website. While it’s not likely to happen if you’re careful, it happen as i experienced even i have done with utmost care.
One of the most important ways to protect your website is by using a child theme. A child theme is typically a style sheet that is kept separate from the rest of your theme files on the webserver that you are using.
You can input CSS (cascading style sheets) into a child theme to customize the look of your website.
There are 2 reasons you do this:
- It’s hard to break your site
- It protects you from updates
Step 5: Connect your domain name to your web host:

If you have chosen a registrar that is different from your web hosting service you’ll need to connect your domain name with your web host. In order to connect your domain name with your web host all you have to do is ask your web host for your server name or DNS (Domain Name Service) and plug your DNS into your domain name registrar account.
You can also contact your domain name registrar and have them guide you through it as it can be a bit confusing for the first time around.
Step 6: After you are done with a functioning website, what to do next ?:
This step is about after getting a fully working website we need to get more audience and we need to promote our business by following simple sub-steps mentioned below:
Sub-step # 6.1 – Get a logo
Sub-step # 6.2 – Write basic copy
Sub-step # 6.3 – Install analytics and look into it frequently
Sub-step # 6.4 – Plan your marketing strategy for the effective use of your website
Conclusion:
Before you get started with the six steps to creating your first website, I need to tell you one more thing: Be patient.
Everyone struggles while building their first website even me more than you all. You will get better, the more that you practice.
If you’re getting frustrated with something, take a deep breathe, relax for a some time, then search a solution for your problem.
Still if you didn’t get a solution drop a mail at blogsofmihir@gmail.com or drop a comment below……
Author : Mihir Bommisetty

Nice illustrations…. Good content… very easily explained….
LikeLike